New Relic Metrics Integration
Integrating with New Relic’s monitoring service will allow to display their metrics on your StatusCast page.
New Relic Settings
To get started log into your New Relic account and navigate to Account settings > Integrations > API keys tab. StatusCast utilizes your API Key to retrieve basic data related to your monitors. Copy your API key.

Statuscast Settings
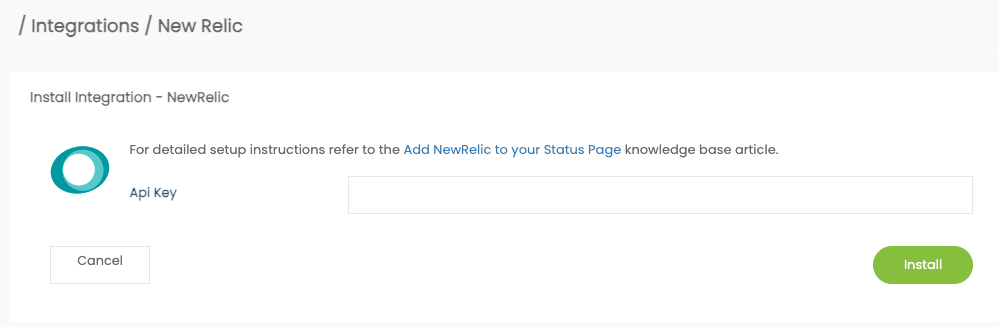
With the API Key, sign into your StatusCast admin portal(https://[yourapp].status.page/admin) and navigate to the Integrations section (Settings > Integrations). Locate the New Relic card and select Install.

Paste the API key into the New Relic API Key field and click Save to finalize the integration setup.
Add New Relic to Statuscast Metrics
Then add New Relic to your list of Metric Providers. This is done by going to Settings > Settings > Metrics and clicking on NEW METRICS.

Then select New Relic from the Type dropdown and fill in the other fields and click CREATE.

Add a New Relic Metrics Widget to Your Page
Now StatusCast is receiving metric information, to add it to your status page navigate to the Page Design section by clicking the blue badge on your status page.

From the Edit Page widget on the right, drag the Metrics widget and drop it into your Page Layout.

Configure the Metrics Widget
Next select the edit icon then search and select New Relic from the 'Metric to display' dropdown under the General tab. Then fill out the Time range field and click Apply.

To apply the changes to the metric configuration, click 'Save Changes' in the Edit Page widget and click Exit Editing to exit to your StatusCast status page to see your New Relic metric in action!
Updated over 1 year ago